
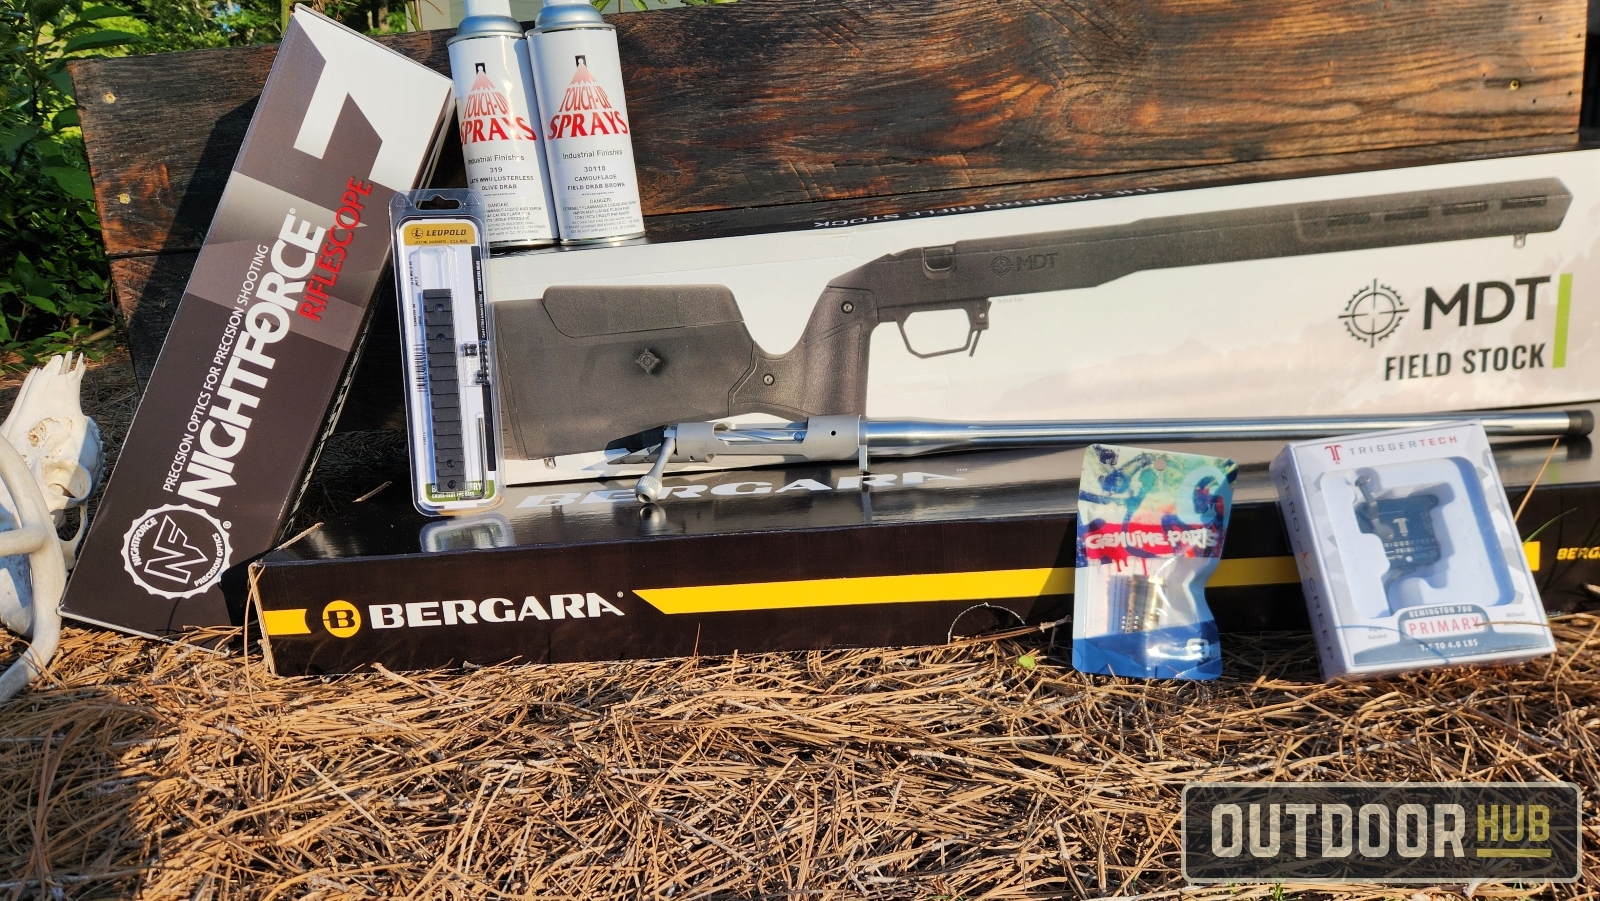
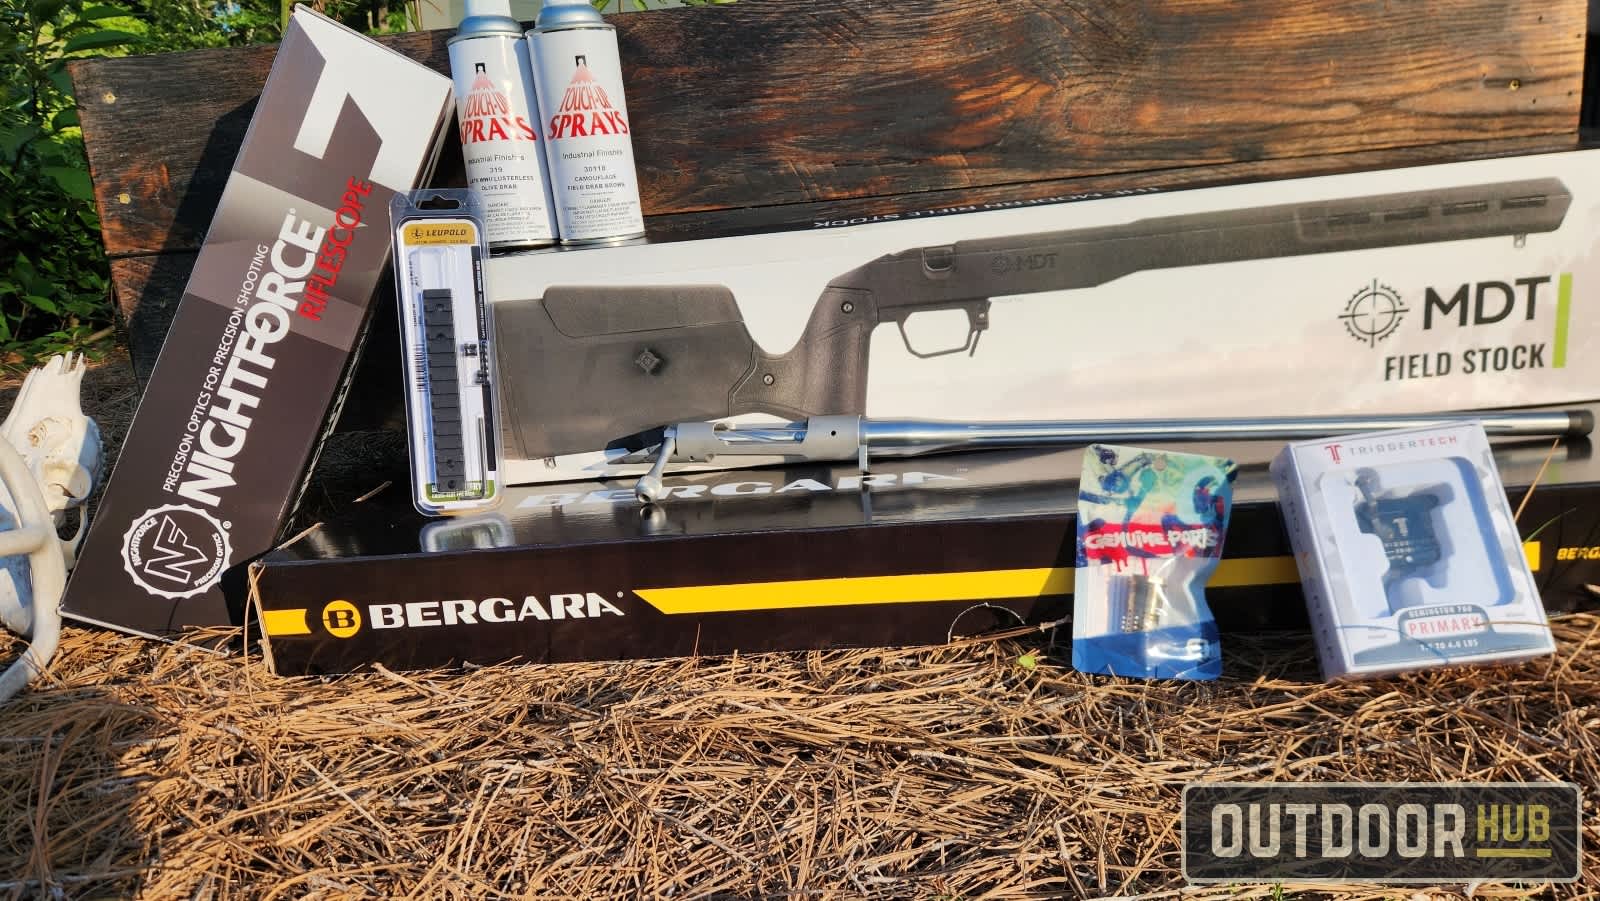
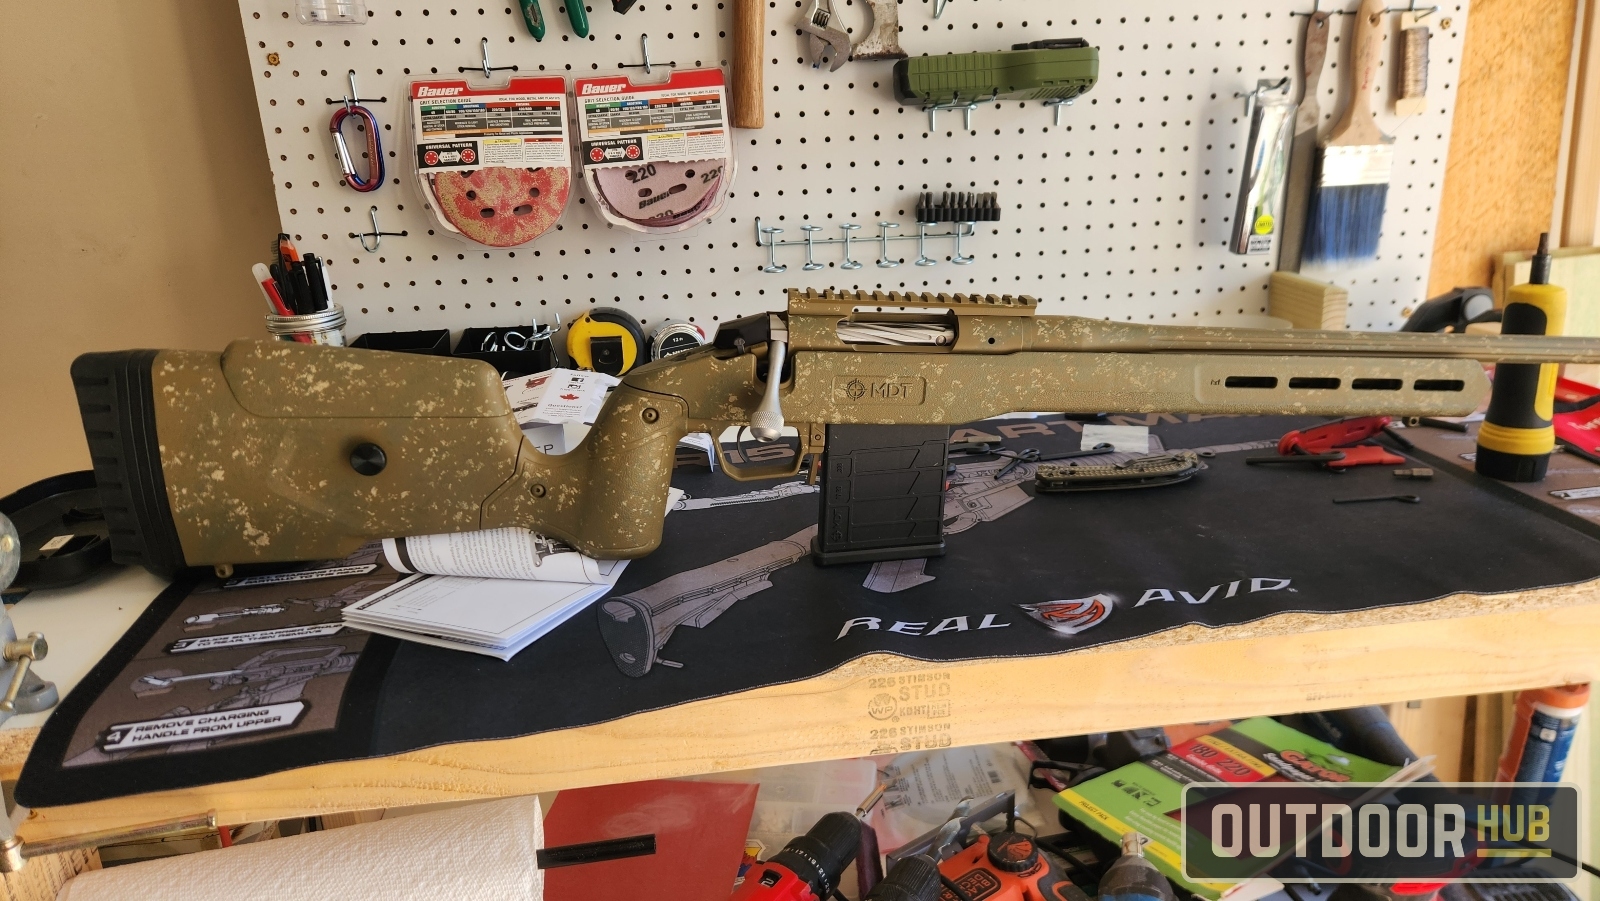
With the current availability of high-quality actions and barrelled actions, you no longer need to be satisfied with a stock hunting rifle or spend the big bucks to wait on a professional gunsmith to build you a custom deer rifle. You can easily put together a premium-quality hunting rifle at home with just a few basic tools and a little bit of know-how, which you can easily find online, like in this article, for example. I’m building myself a custom deer rifle for the whitetail firearm season this year with a Bergara Premier Barreled Action No. 4 Contour in .308 Win. This is a newer offering from Bergara of their made in the USA, Premier Series, which features premium stainless steel actions and barrels, a floating bolt head, and a toolless bolt disassembly.
Hunting Coverage on OutdoorHub
The Parts – Bergara Premier Deer Rifle Build
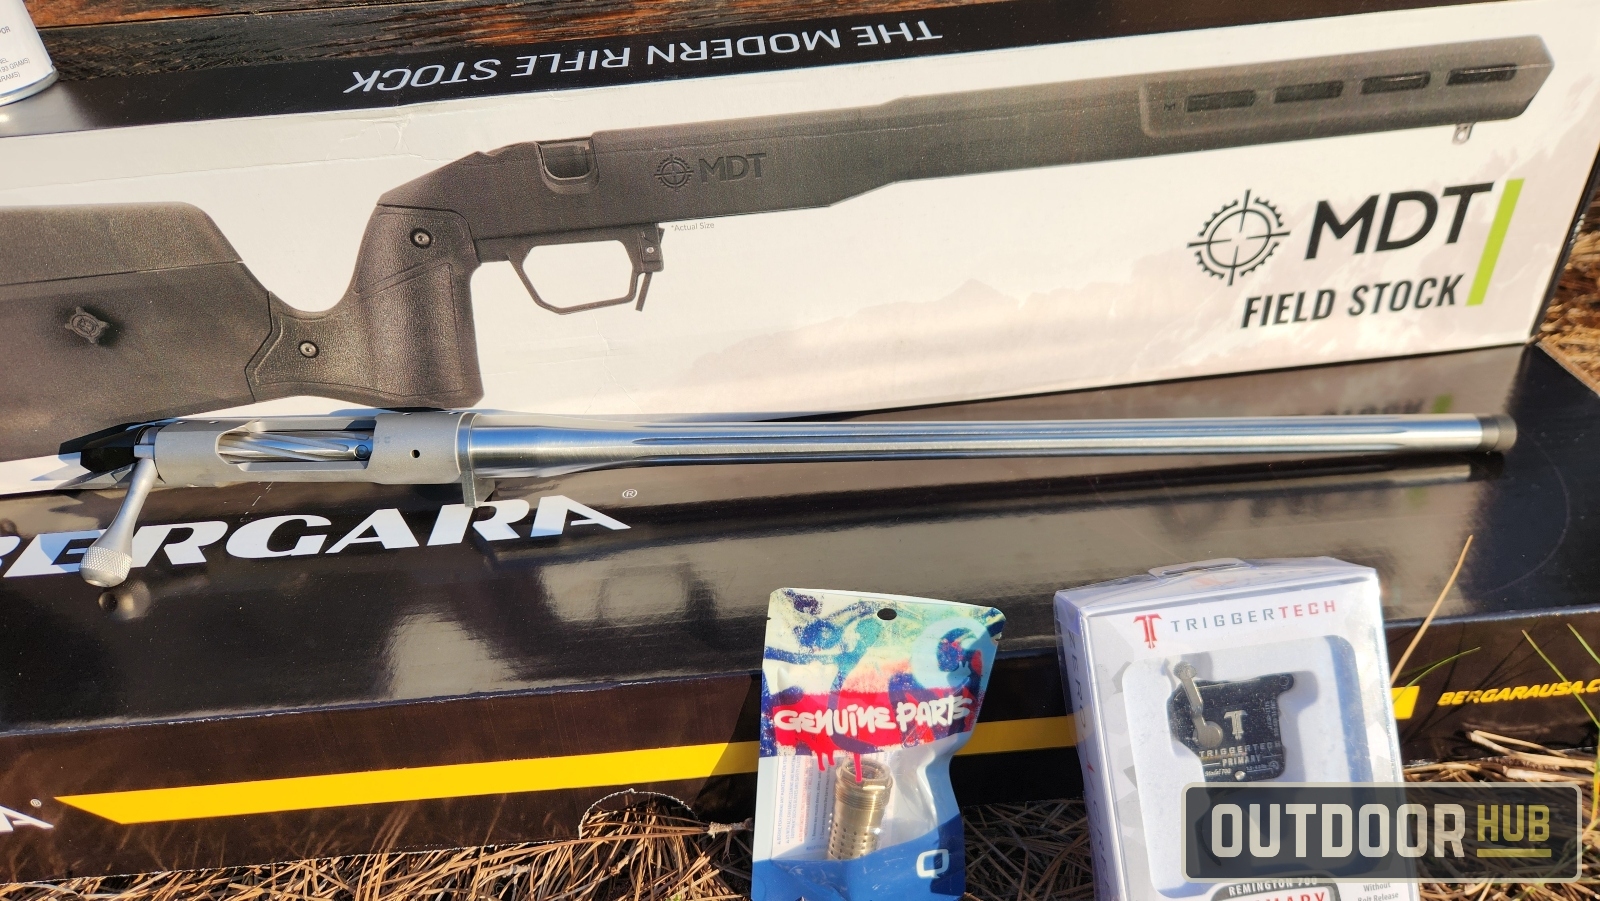
Action and Barrel – Bergara Premier Barreled Action No. 4 Contour, 1:10 Twist, Threaded 5/8-24
A barreled action originally used on the Canyon Premier rifles, it is a blend of weight savings and stiffness. A lighter action option that is still capable of precision accuracy, coming in at only 4 pounds with the 20″ .308 win option. It is made of high-quality 416 stainless steel and is made in the USA. MSRP – $1349.99
Stock – MDT Field Stock Chassis System
While still looking like a traditional hunting rifle stock, this chassis system offers all the modern features shooters want for an accurate rifle. With aluminum v-block bedding, free-floating forend with M-LOK. and an adjustable buttstock, the MDT Field Stock is a great option for both hunting and casual long-range shooting. The only downside is that it isn’t the lightest option at about 3lbs, but it is very cost-effective with all its features, with an MSRP of $299,95
Scope – NightForce SHV – 4-14x56mm MOAR 30 MOA Non-Illuminated
Nightforce’s quality and ruggedness speak for themselves. This 4-14x magnification is perfect for hunting in the Southeast, where a long shot is usually well under 200 yards. The high-quality glass transfers tons of light, letting you see clearly even during low-light conditions. Additionally, the capped turrets shield your scope’s turret adjustments, so no accidental movement to cause you to lose zero. MSRP – $995
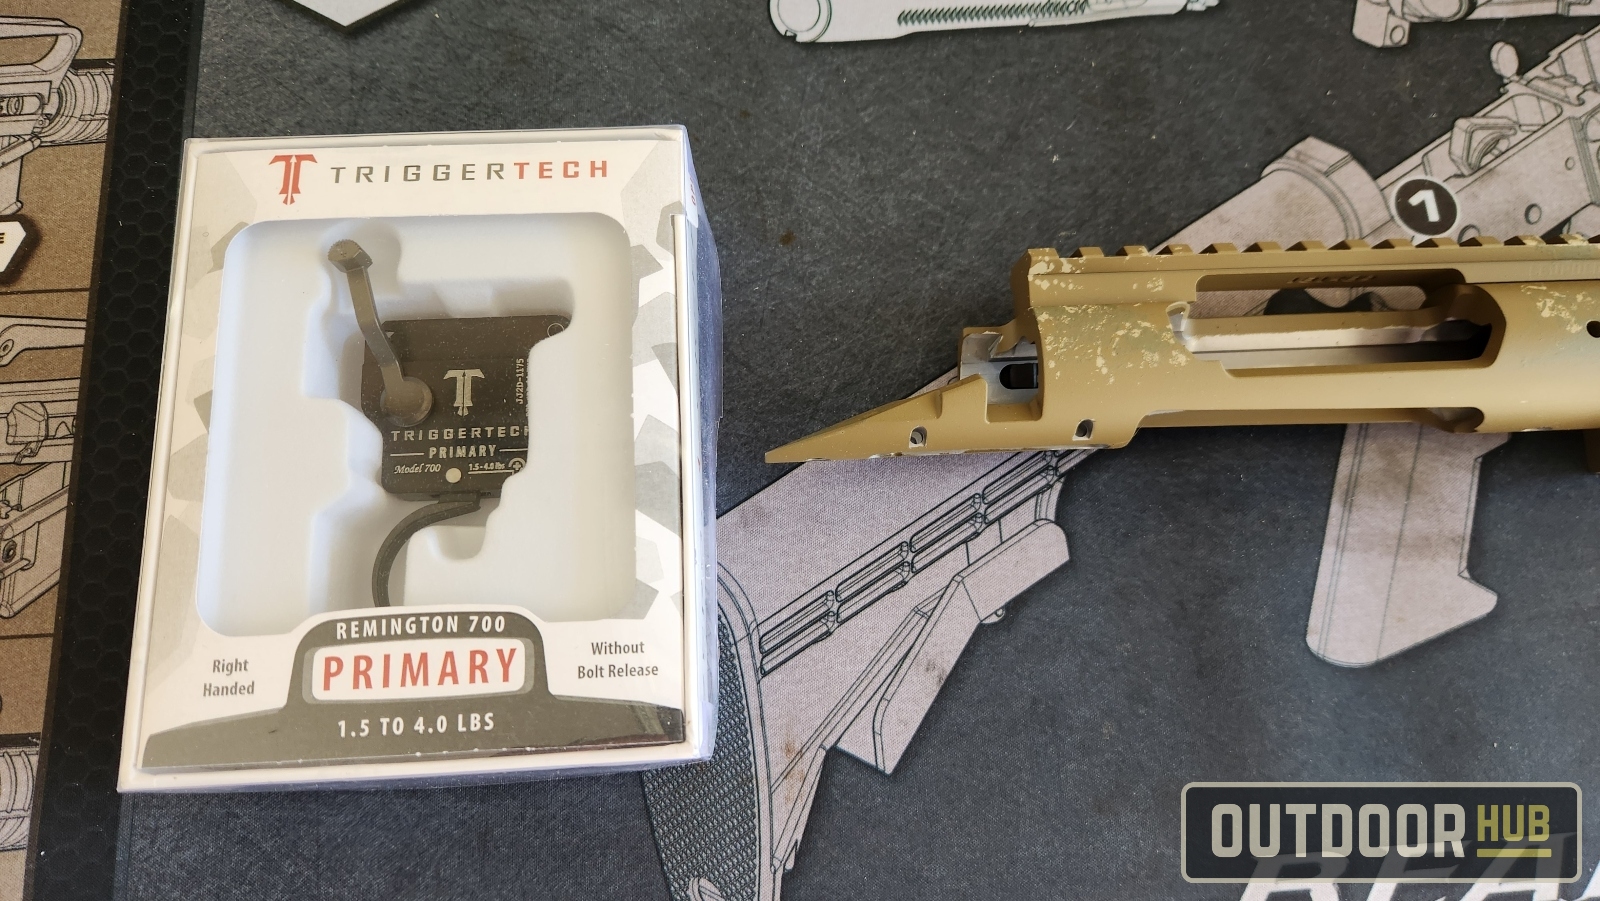
Trigger – Triggertech Primary
Triggertech makes some of the best cassette triggers on the market. The Triggertech Primary comes with an adjustable pull weight and Zero Creep Technology. The pull weight range of 1.5 to 4.0 lbs makes it exactly what I’m looking for in a hunting rifle trigger. MSRP – $169.99
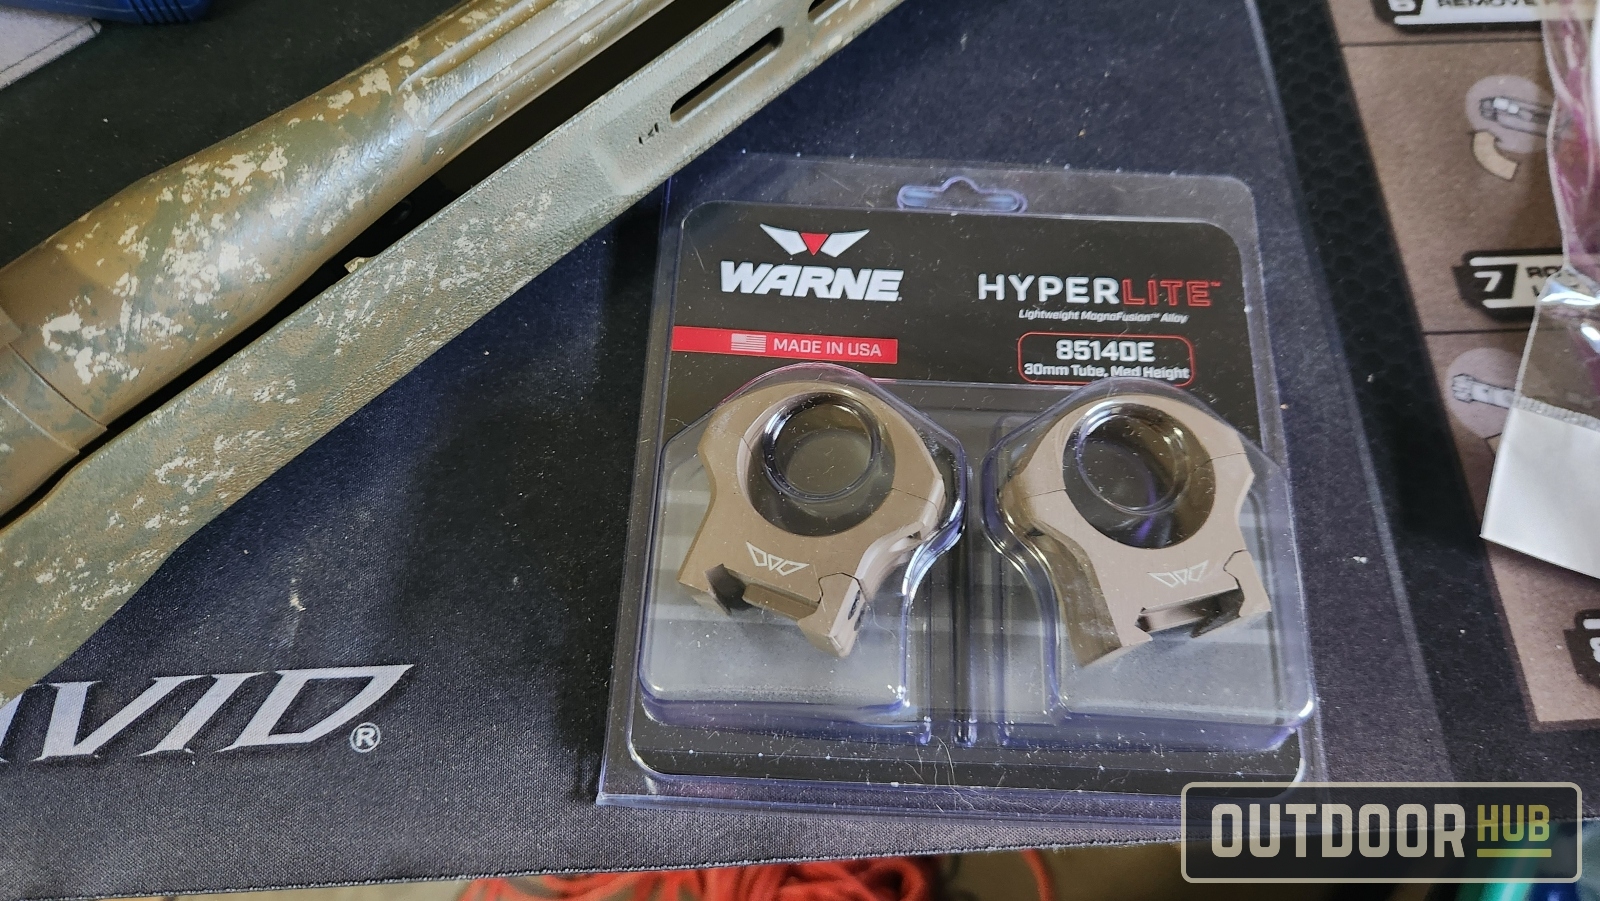
Rings and Rail – Warne HyperLite 30mm Md Height Rings & Leupold Backcountry 20 MOA Base
Warne has been my go-to company for mounting optics. The HyperLite rings are an ultra-lightweight option. Coming in at only 2.48 ounces for the pair of rings, these MagnaFusion Alloy rings still offer plenty of strength and stability. MSRP – $119.99
Paint – Rapco Spraypaint
Suppressor – Q Trash Panda w/ Rearend
Cartridge – .308 Winchester
Painting – Bergara Premier Deer Rifle Build
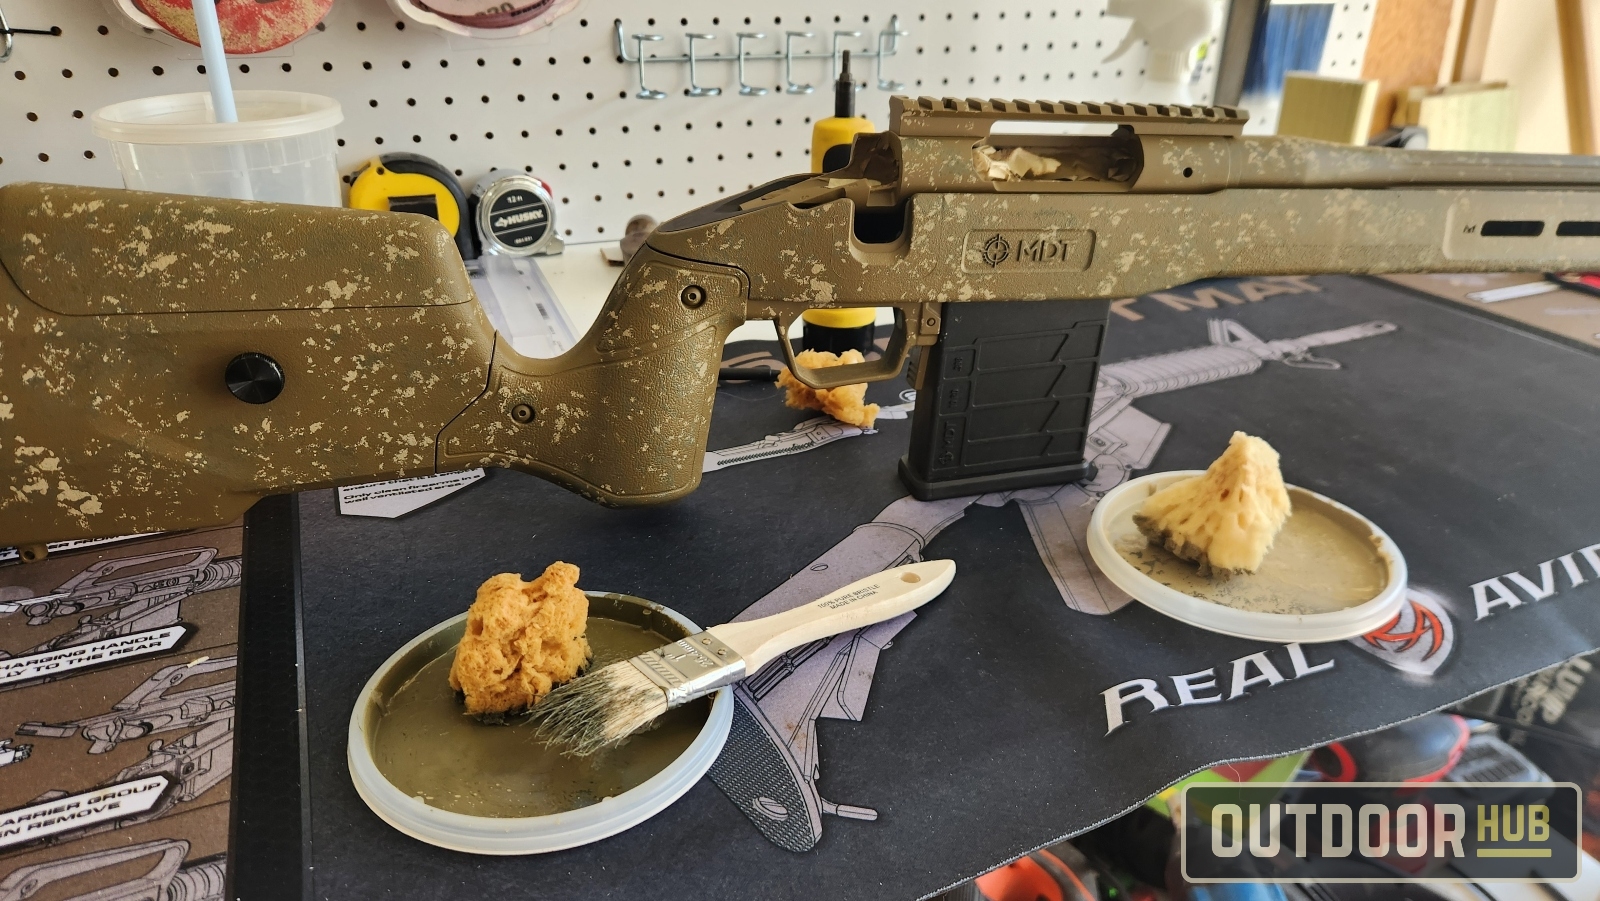
This step is optional, especially with the Bergara Premier barreled actions, as they are made from 416 stainless steel and honestly look very nice in the white in a black stock. Paint doesn’t make the rifle any more accurate, but boy, it sure can make your rifle look nice. My paint of choice is Rapco Spraypaint, a high-quality spray paint with plenty of camo color options that cures very hard. With a little prep, you can easily paint your rifle with this at home for a fraction of the cost of sending it out for a paint job.
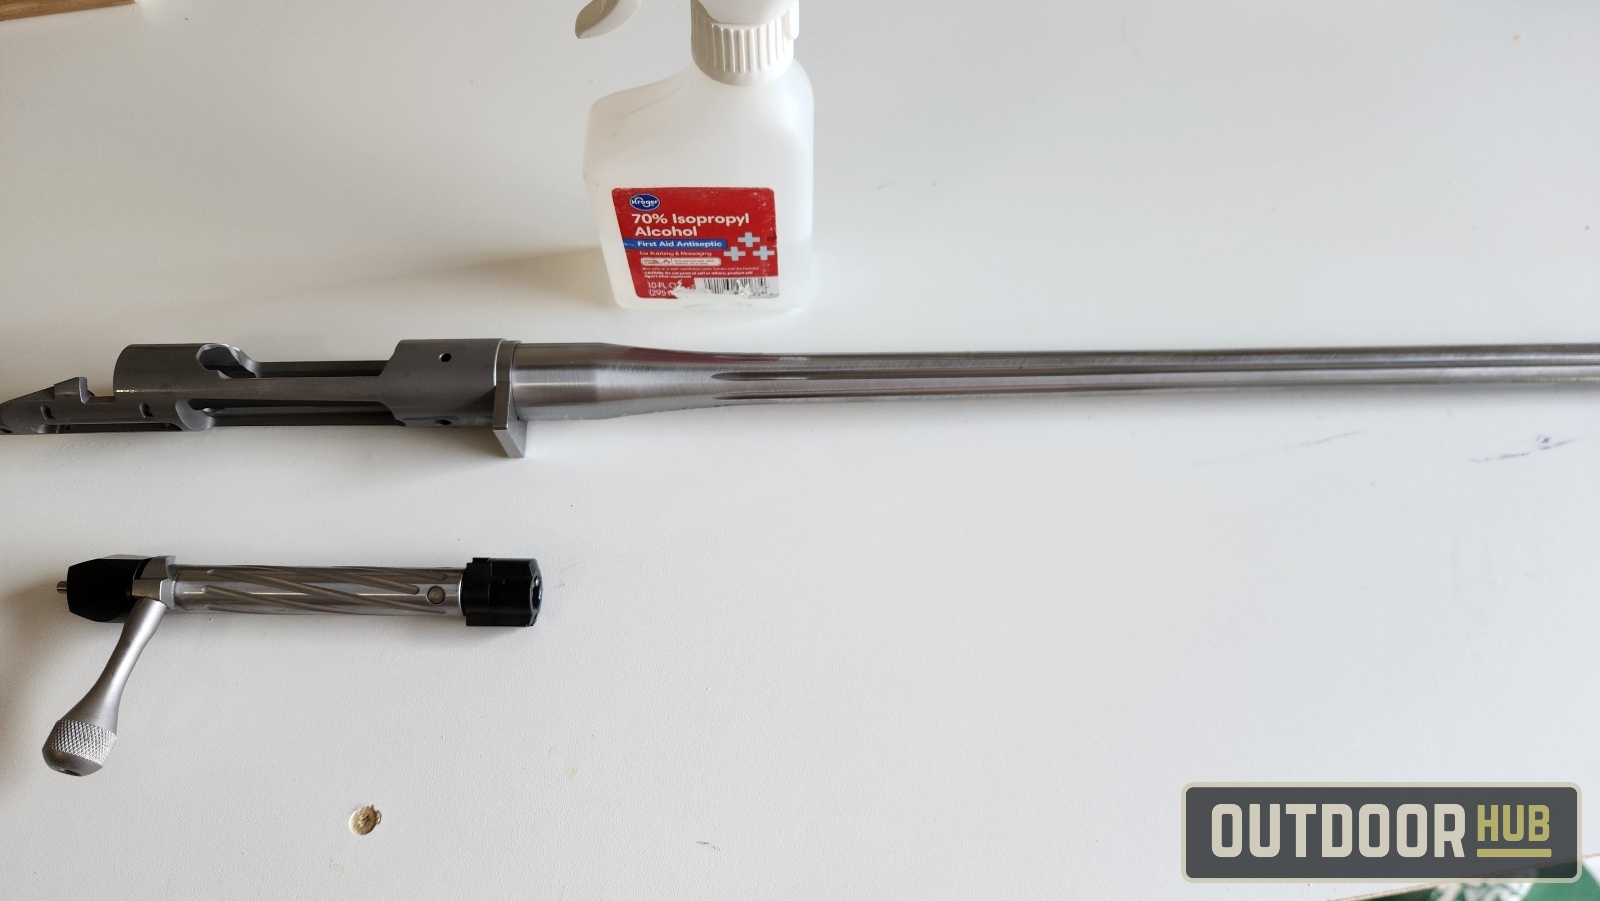
The first step is to degrease the action, barrel, and stock. This removes any extra oil and grease from manufacturing. Then, if you are going to use a top rail, degrease it and attach it to the action at this point.
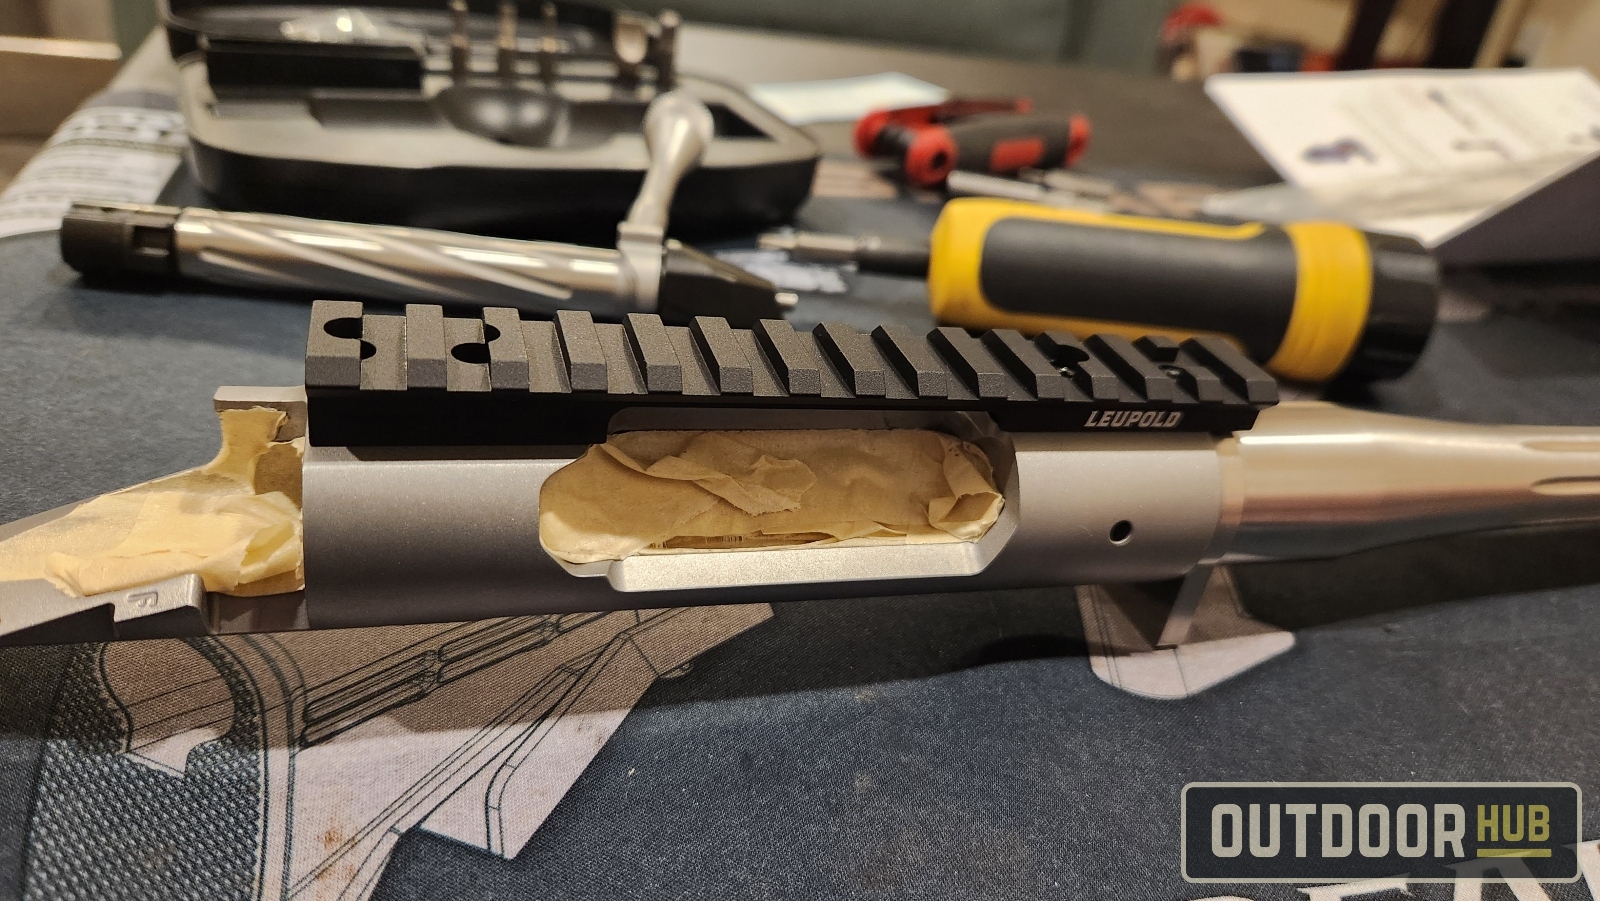
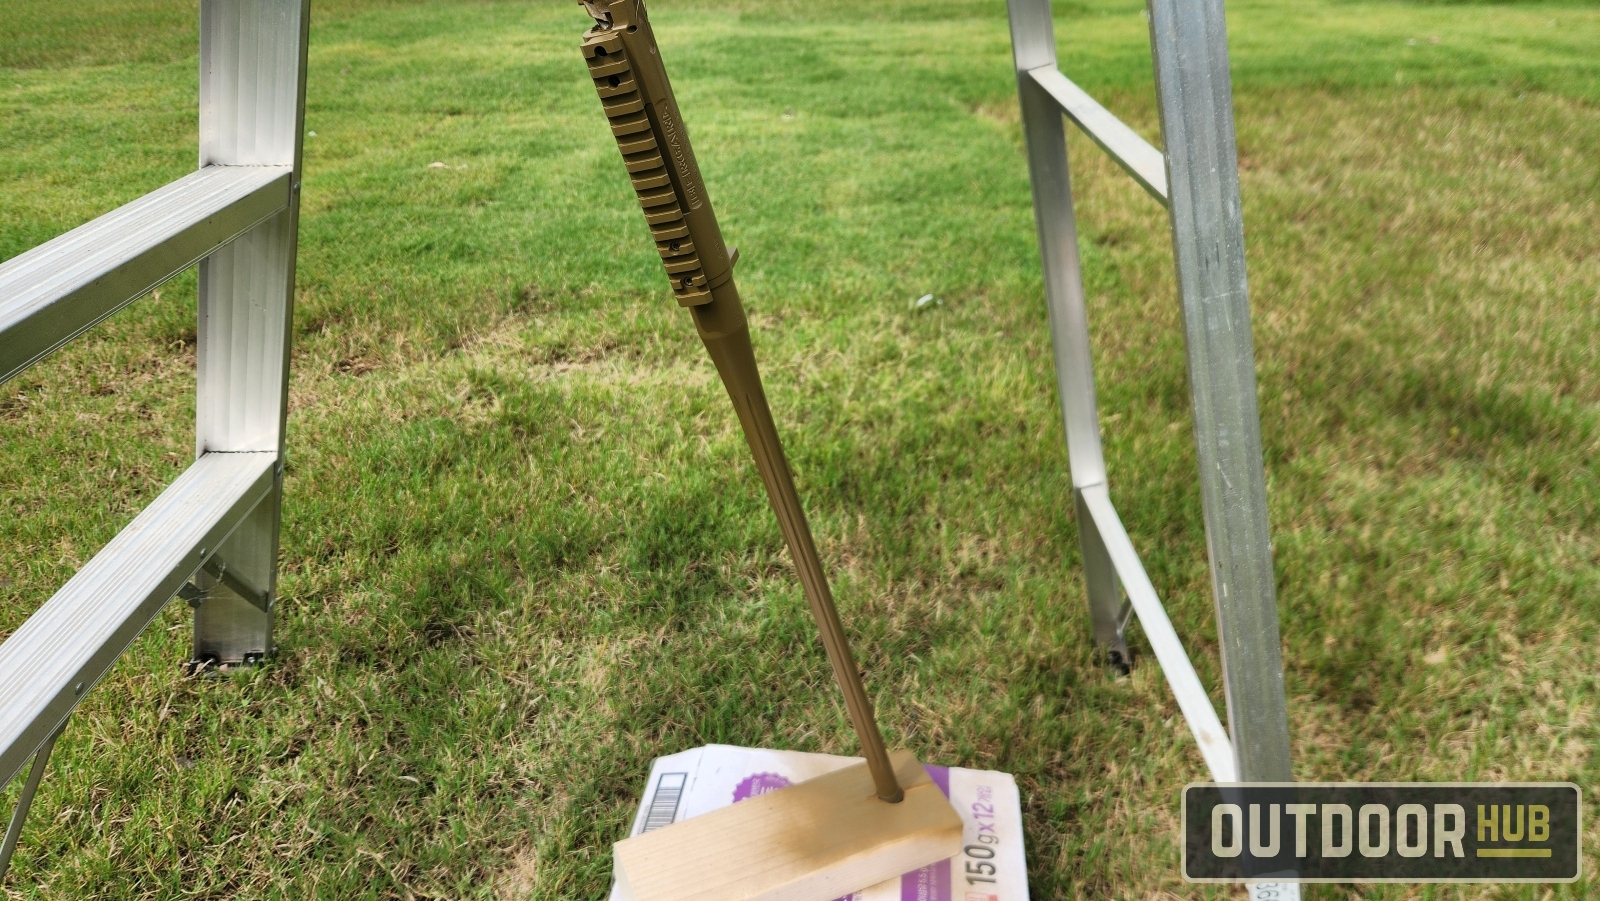
After that, you need to tape off all the vital areas of the receiver, barrel, and stock. Make sure to properly adhere your tape so no spray paint can get onto the chamber, barrel, or any of the threads. Then start wiring your pieces to hang as you paint them. This makes it easier to have even coverage and a nicer finish. Once everything is wired up and ready, give the parts another wipe-down to ensure there is no oil on the surfaces. Proper surface prep is the most important thing for a nice paint job. If you don’t have a painting booth, a ladder works wonders. Follow the instructions for applying the paint and applying additional coats. I went with 2 coats and then left the parts to cure, hanging them up in the garage for a few days.
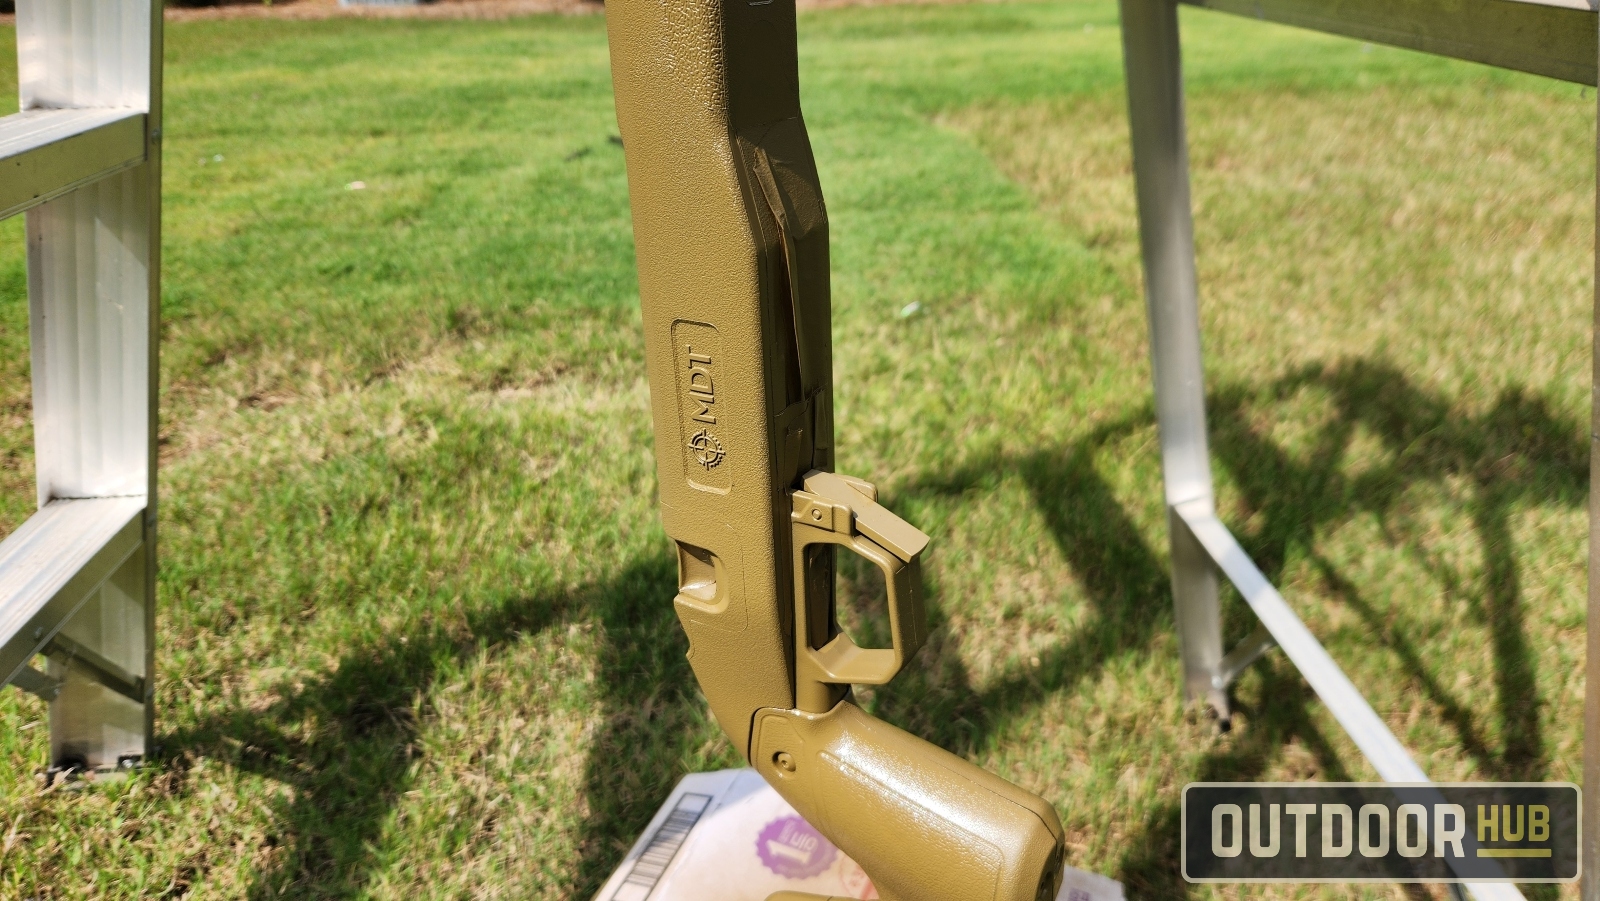
Once the base coat paint is fully cured, you can move on to whatever camo pattern you want for the rifle. Set the action into the stock and start painting how you like. I prefer using natural sea sponge pieces to dip into the paint and dab across the surface, followed by some dry brushing with another color to break up the patterns. After your camo job is done, let it cure again for a few days before handling.
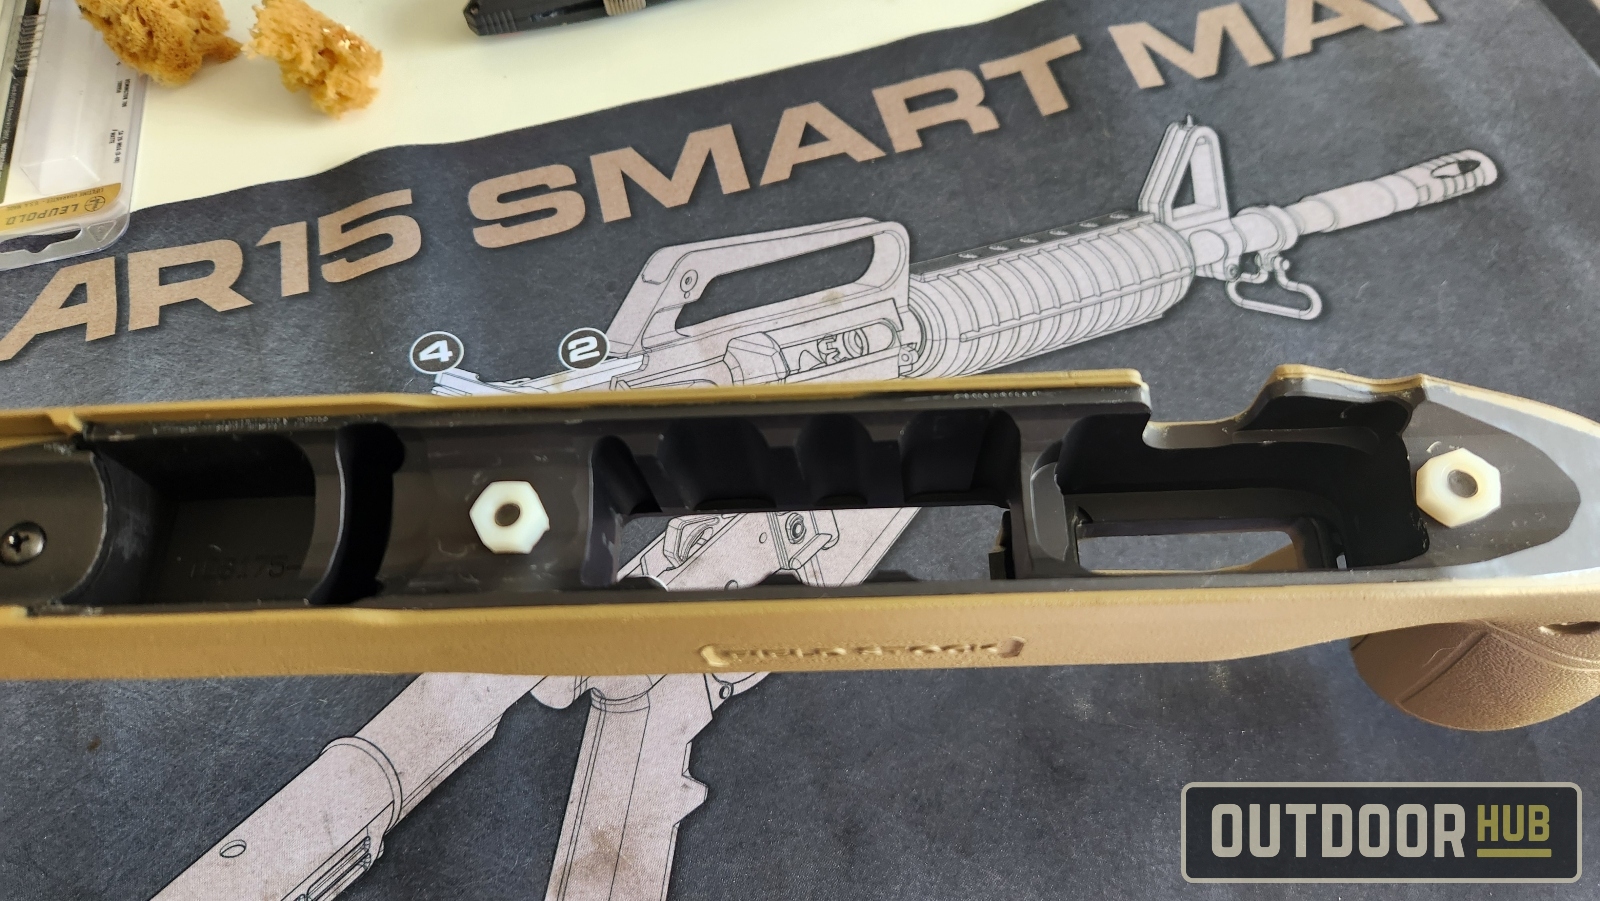
Once cured, remove all the taping you did, and you are ready for final assembly.
Assembly – Bergara Premier Deer Rifle Build
The assembly of a modern custom deer rifle with a factory-barreled action is pretty much adult Legos. Well, as long as you have a quality torque wrench and pay attention to the manufacturer’s torque specs of your parts. Though the first step for assembly does not require a torque wrench, it instead requires a hammer and a punch.
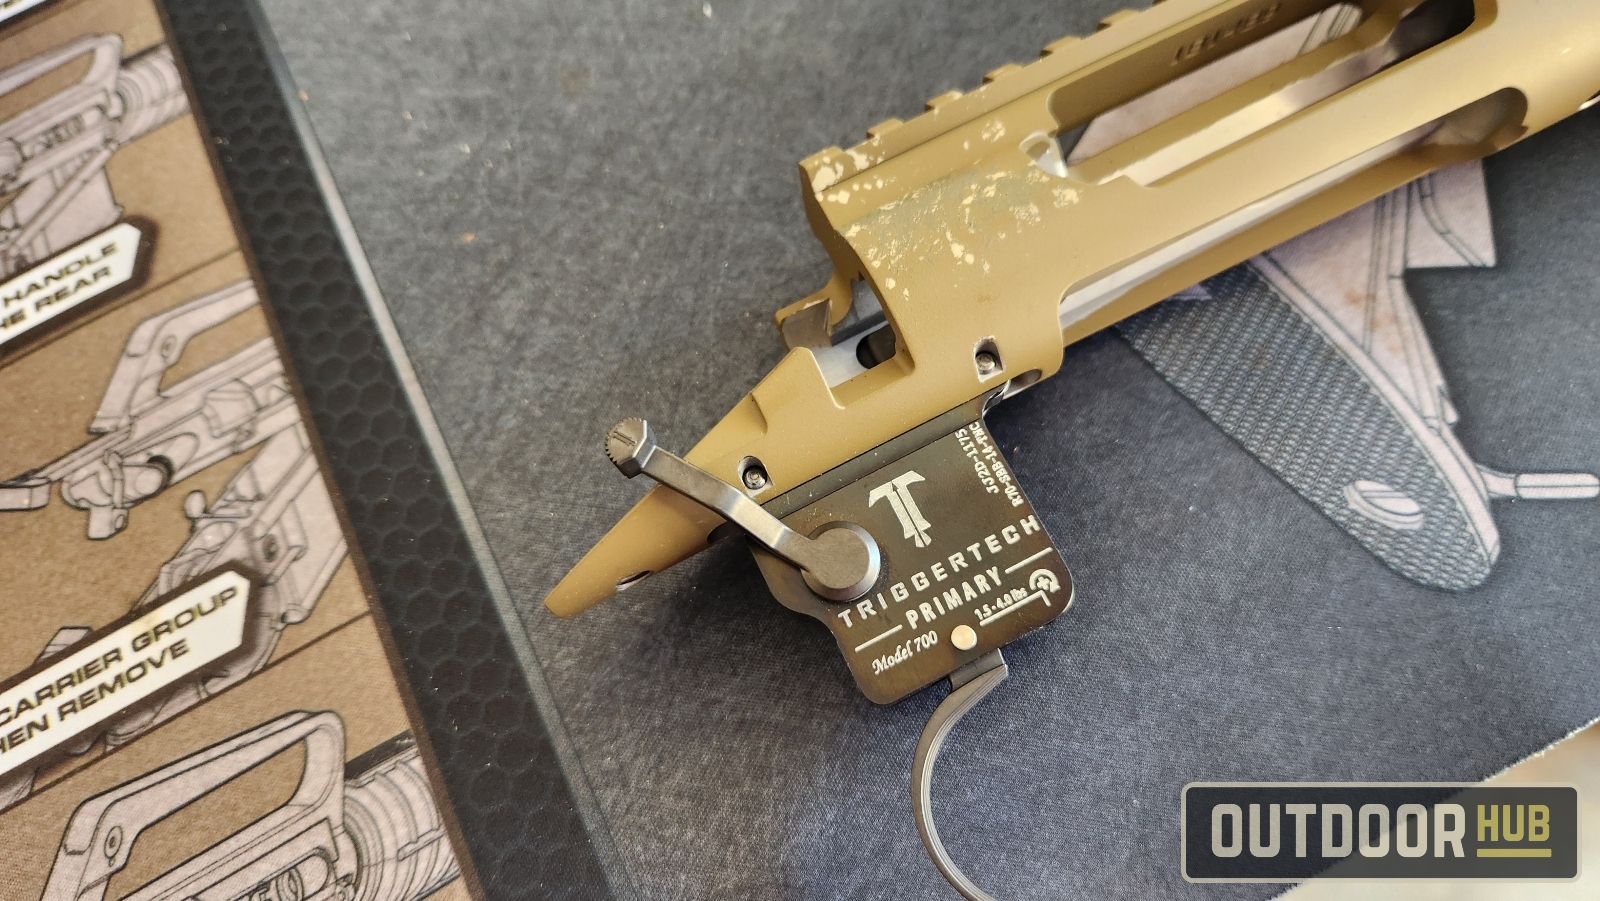
Place your trigger in place, line up the holes, and tap in the pins. If the pin holes were taped properly, it should not take too much force to seat the pins.
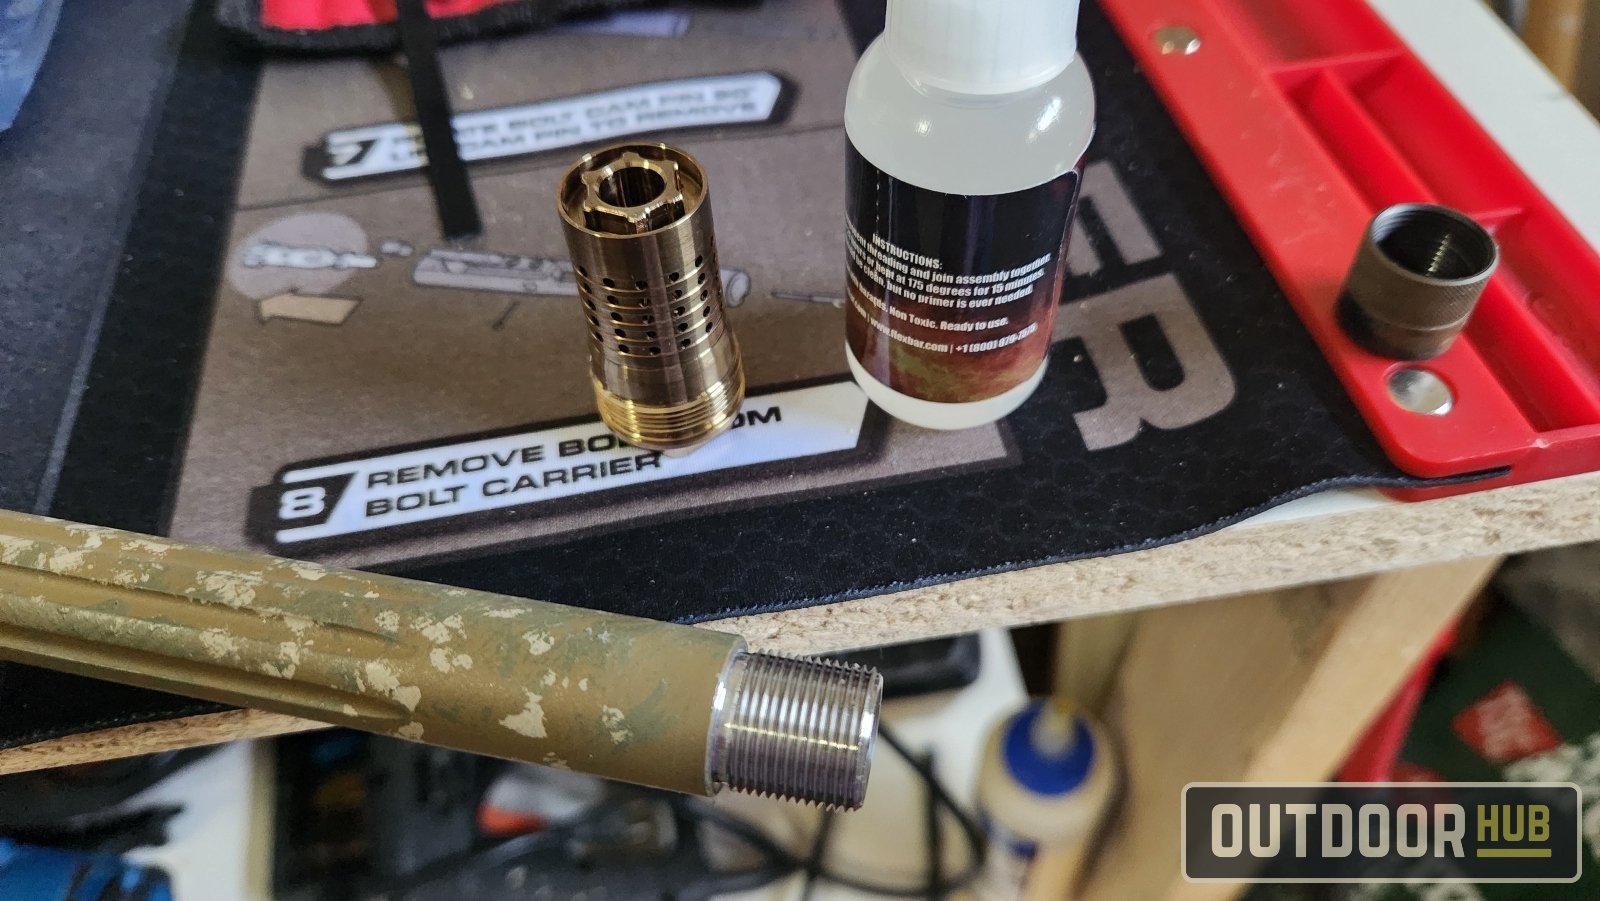
Next, mount the muzzle device. Start by cleaning and degreasing the threads thoroughly. Once the threads are clean, apply a couple of drops of Rocksett. Less is honestly more with this stuff. Then, again, following the manufacturer’s instructions, torque to spec and leave the muzzle device alone so the Rocksett cures and locks the muzzle brake in place.
Now you have your trigger and muzzle brake in place, mount your action into the stock. Again, follow the manufacturer’s torque specs, and use a proper torque wrench to tighten the two screws. Once that is done, all that’s left for assembly is mounting your optic.
With your top rail already attached, you want to mount the rings onto it, but don’t torque down the screws just yet. First, find exactly where you need your scope to sit before tightening anything down.
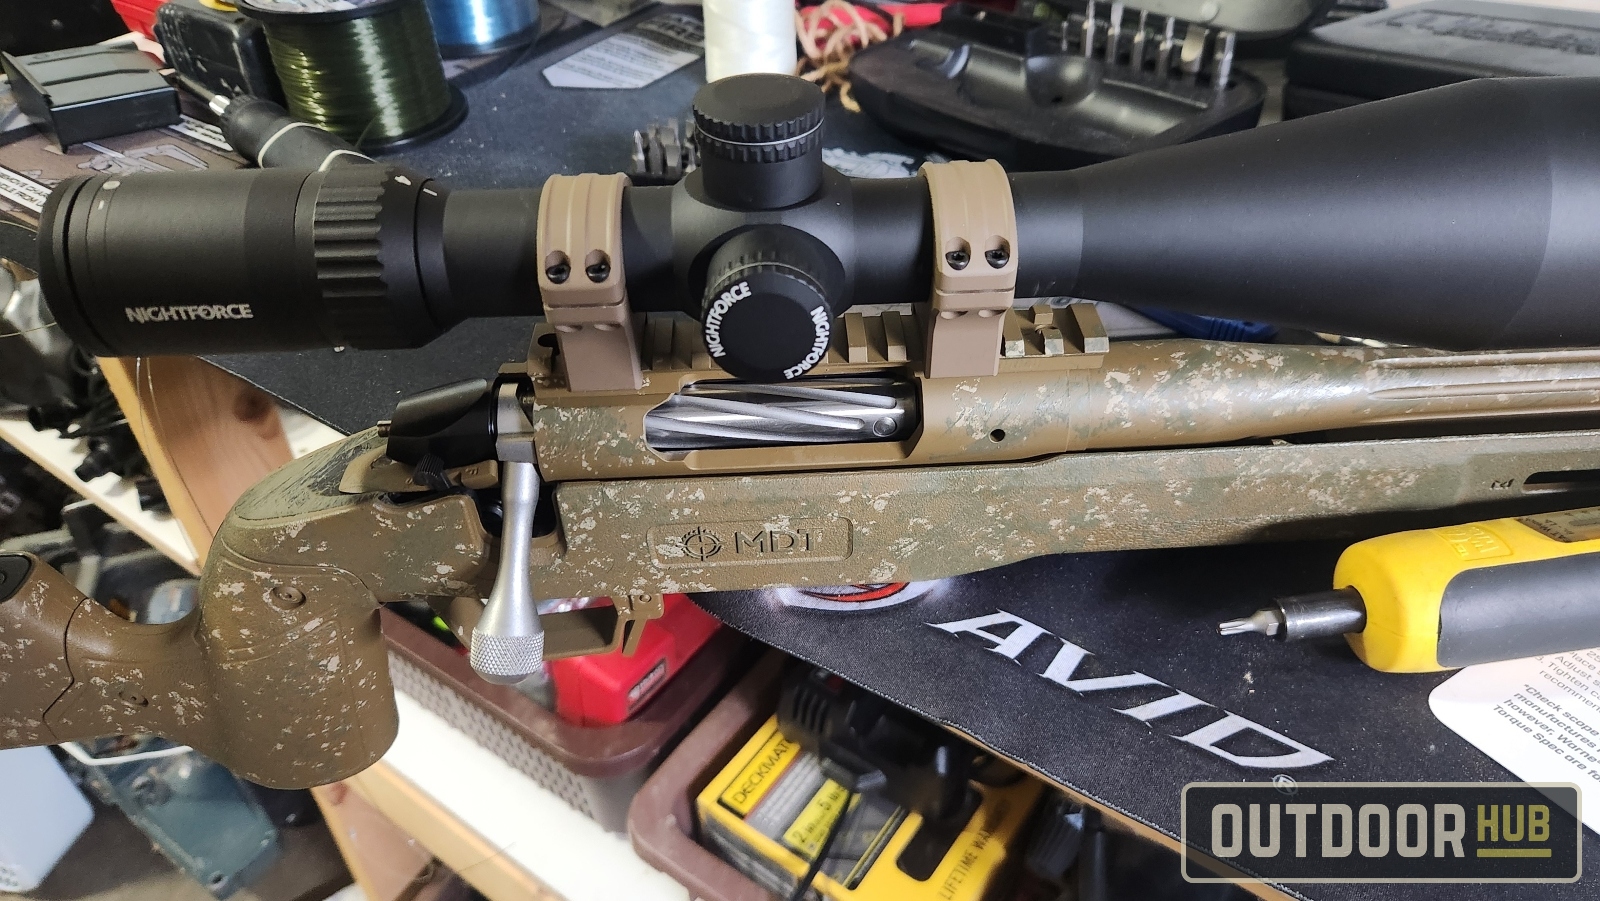
Look through your optic to find the eye box, and figure out where exactly everything needs to sit before locking everything down to spec. If you are using lightweight alloy rings like I am here, it’s even more important to match spec as the alloy can easily strip out.
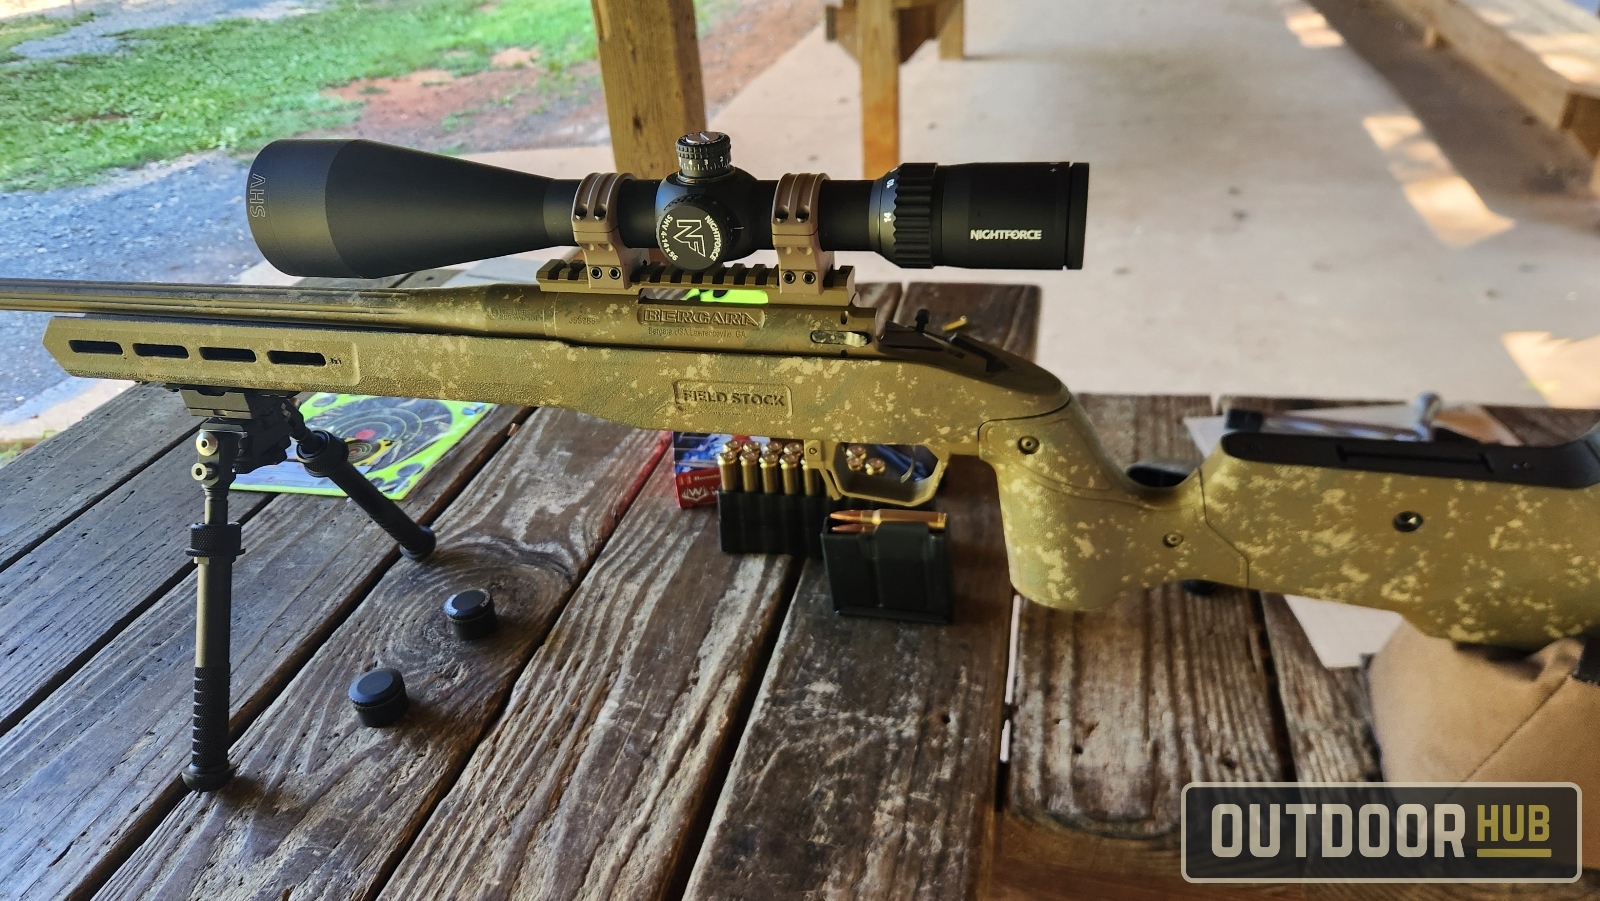
Zeroing In – Bergara Premier Deer Rifle Build
Once you get your rifle assembled, the next step is to take it out to your local range and zero it. Starting off by boresighting in at 50 to get roughly on target. I used some 175-gr .308 target ammo that I know has a similar POI to my hunting ammo in my other rifles. With the suppressor on the rifle, I zeroed with my target loading at 100 yds. Then switched to my hunting round, .308 Hornady American Whitetail 165gr. Interlock Soft Point, to zero the rifle with the round I will be using again in the woods this season.
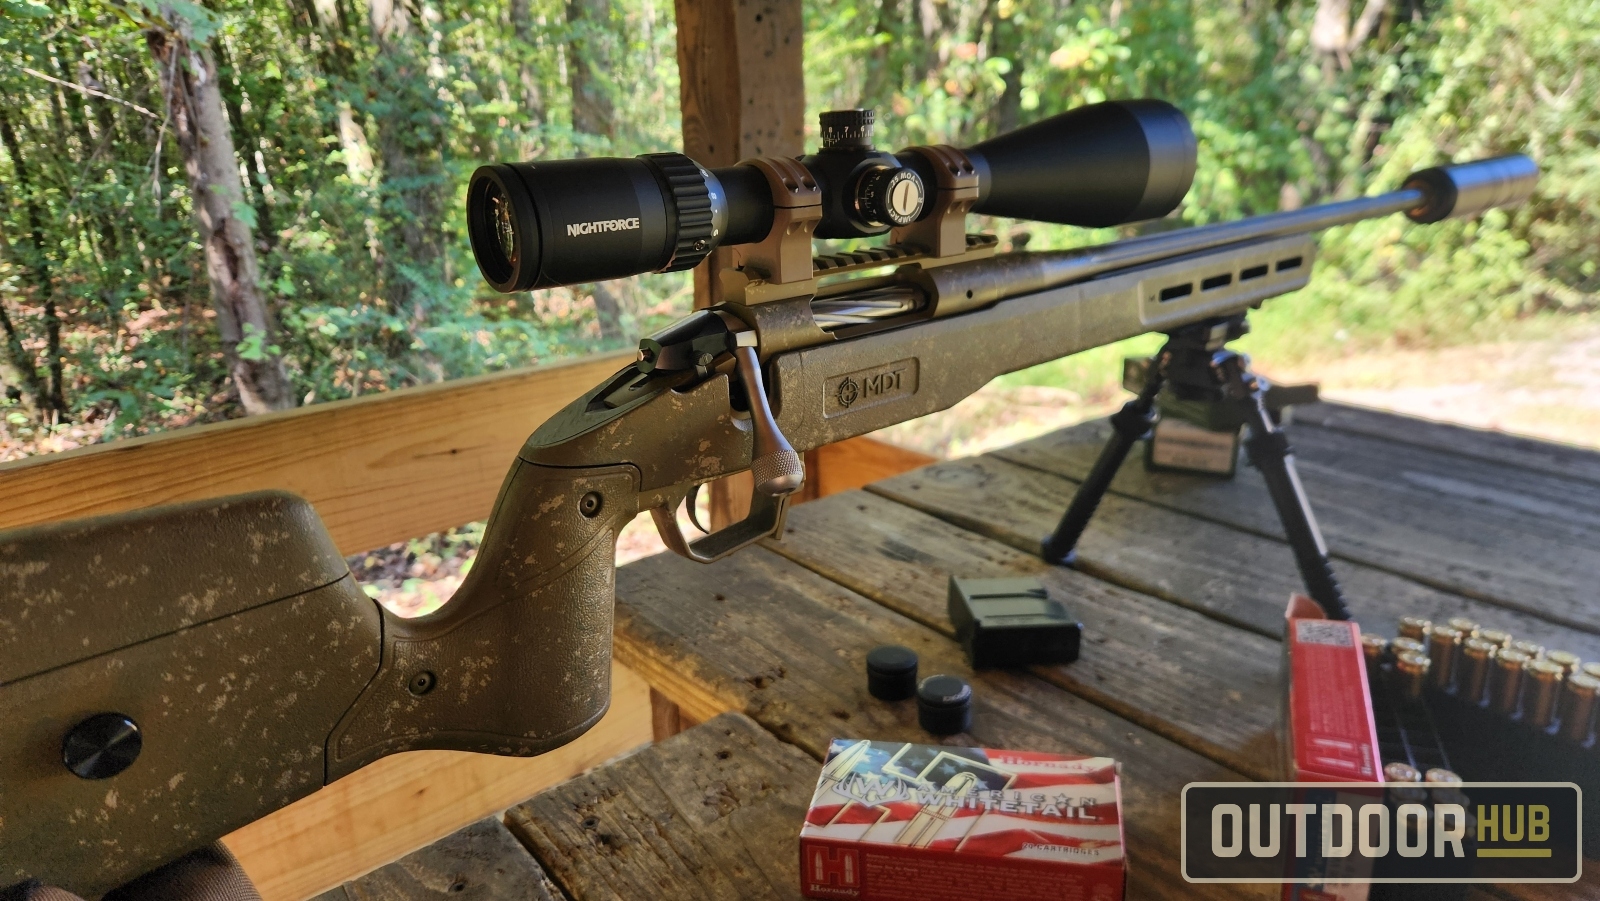
With the rifle zeroed in with my hunting ammo, this premium deer rifle is ready to go for this season. I’ll be spending some more trigger time with this rifle just out of an abundance of caution, but I expect it to perform well this season. So hopefully, the stars align again, and I have another great whitetail season, but if not, oh well. Time out in the woods is always a great change of pace.


Trending Products