
Keith Lusher 04.17.25

Growing up in New Orleans, I knew spring had truly arrived not by the calendar or the pollen in the air but by the unmistakable aroma of crawfish boil seasoning floating through the neighborhood. Those Saturday afternoons were sacred as time seemed to slow down as family and friends gathered from all corners of the parish around a table piled high with crawfish.
The ritual was always the same, yet somehow, new ideas and strategies would emerge. Some of the men claimed to have the “secret” spices that were the best. Some shared their thoughts on how long to let the crawfish soak. But when the time came for the boil, the teamwork kicked in and the chain of command proceeded.
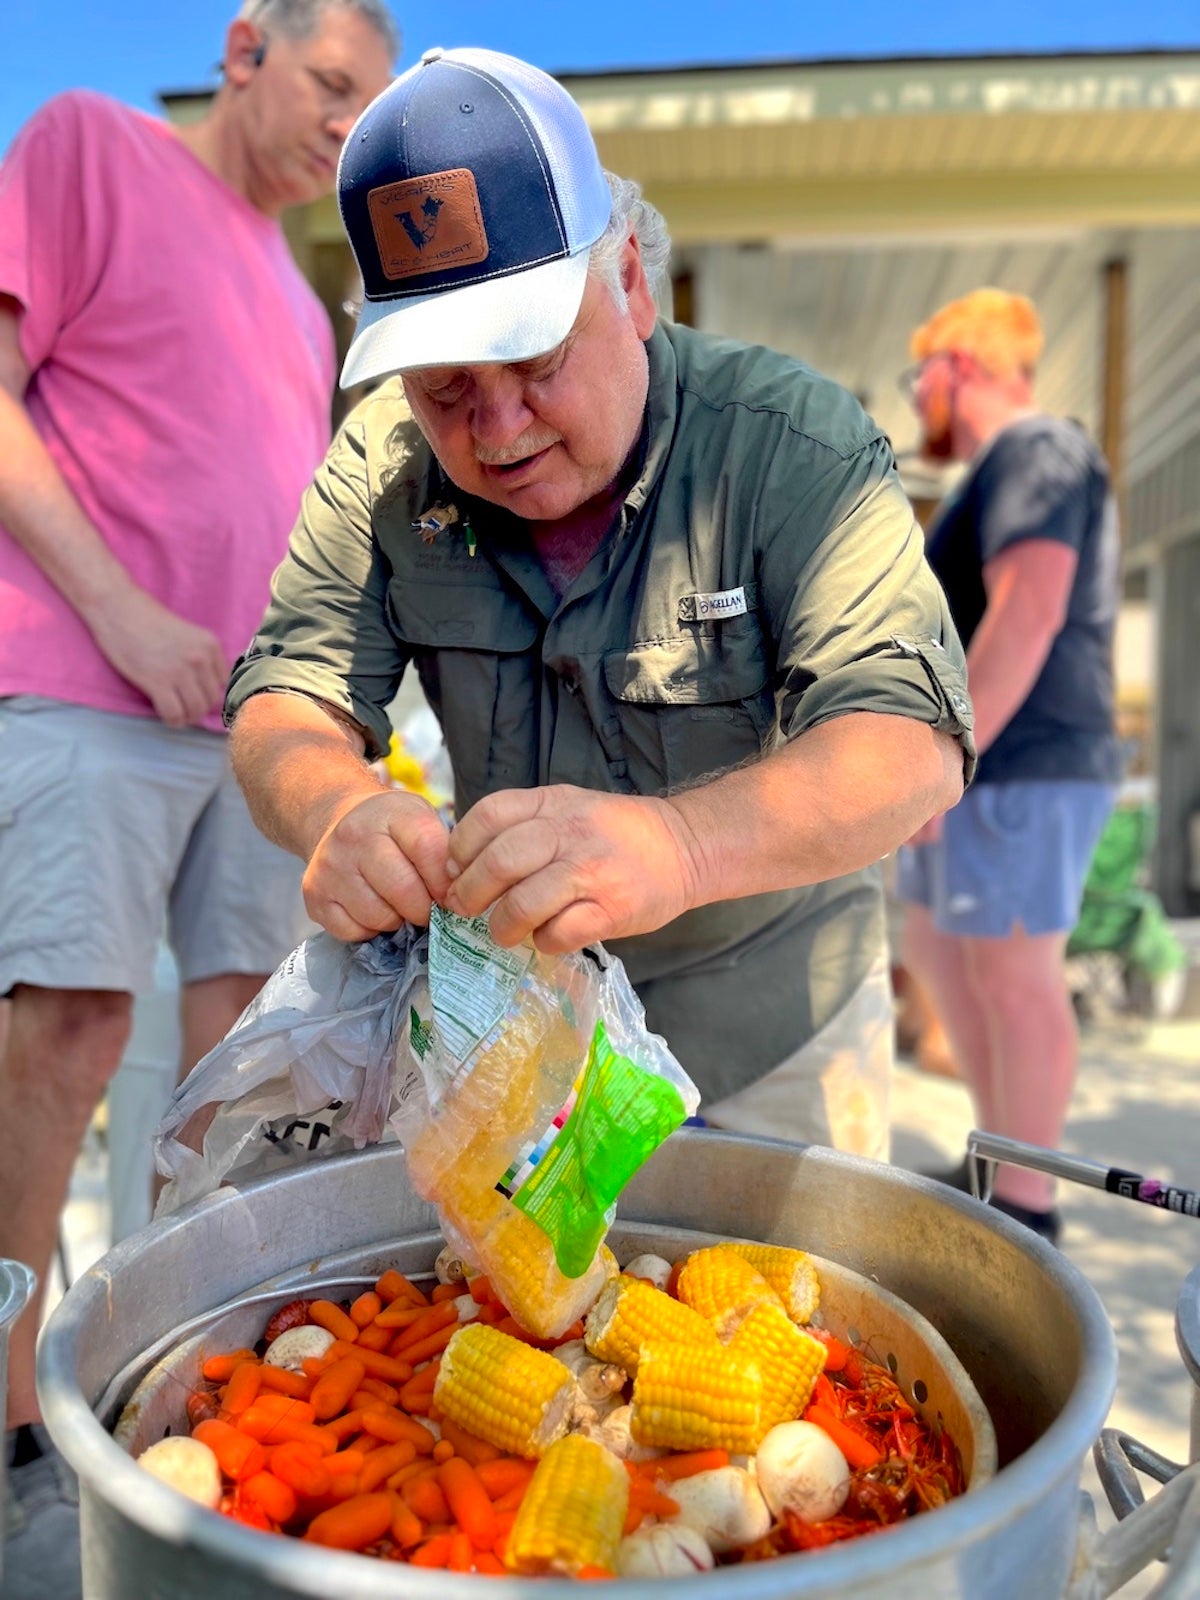
The women would set up their own stations, chopping andouille sausage, and debating whether the potatoes were small enough not to cut in half.
And us kids? We’d run wild through the yard, occasionally being roped in to hose down another sack of crawfish or fetch more newspaper (cheap, disposable tablecloth) to spread on the table.
The Mess
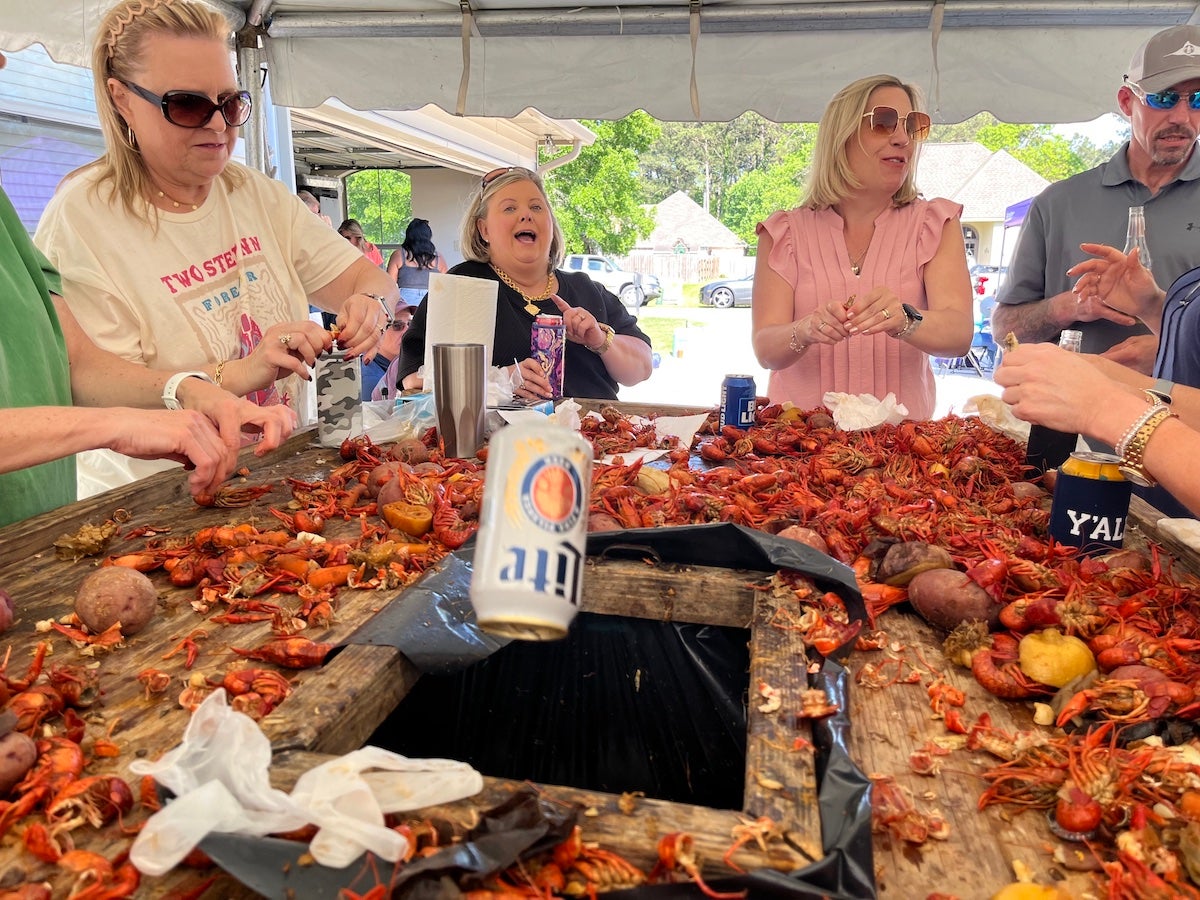
But for all the joy these gatherings brought, there was always one thing that frustrated me to no end – the mess. When the moment finally came to dump the seafood onto the table, it took a lot of effort to keep it all there.
First, there was the challenge of keeping the seafood boil water from dripping off the table and onto the guests.
Second, the crawfish shells would pile up and have to be cleared every five minutes.
It wasn’t until I attended a boil at my friend’s camp in Pearl River that I saw the light. He had built what he called his “crawfish stadium”—a custom table designed specifically for crawfish boils. He referred to it as a stadium because he painted the table to look like the Saints football field.
That night, on the drive back home, I thought up my a design for my own crawfish table and within a week, had it built.
How to Build a Seafood Table
The beauty of this project is that it doesn’t require specialized carpentry skills—just some basic tools, the right materials, and that distinctly Louisiana determination to make something good even better.
Materials You’ll Need:
- One sheet of 1/2-inch thick exterior-grade plywood (I prefer marine-grade if you can swing the extra cost)
- Four 4×4 pressure-treated posts, 8 feet long
- Eight 2×4 boards, 8 feet long (for bracing and the lip)
- One 2×2 board, 8 feet long (for the trash bag frame)
- Exterior wood screws (3-inch and 1 5/8-inch)
- Waterproof wood glue
- Marine-grade polyurethane finish (at least 2 quarts)
- Heavy-duty garbage bags
- Sandpaper (medium and fine grit)

Step-by-Step Construction:
- Cut your plywood base: I’ve found that an 8-foot by 6-foot rectangle works perfectly for most gatherings. This gives you enough space for three people comfortably on each long side and two on each short side—enough for a proper meal without needing to yell across to each other.
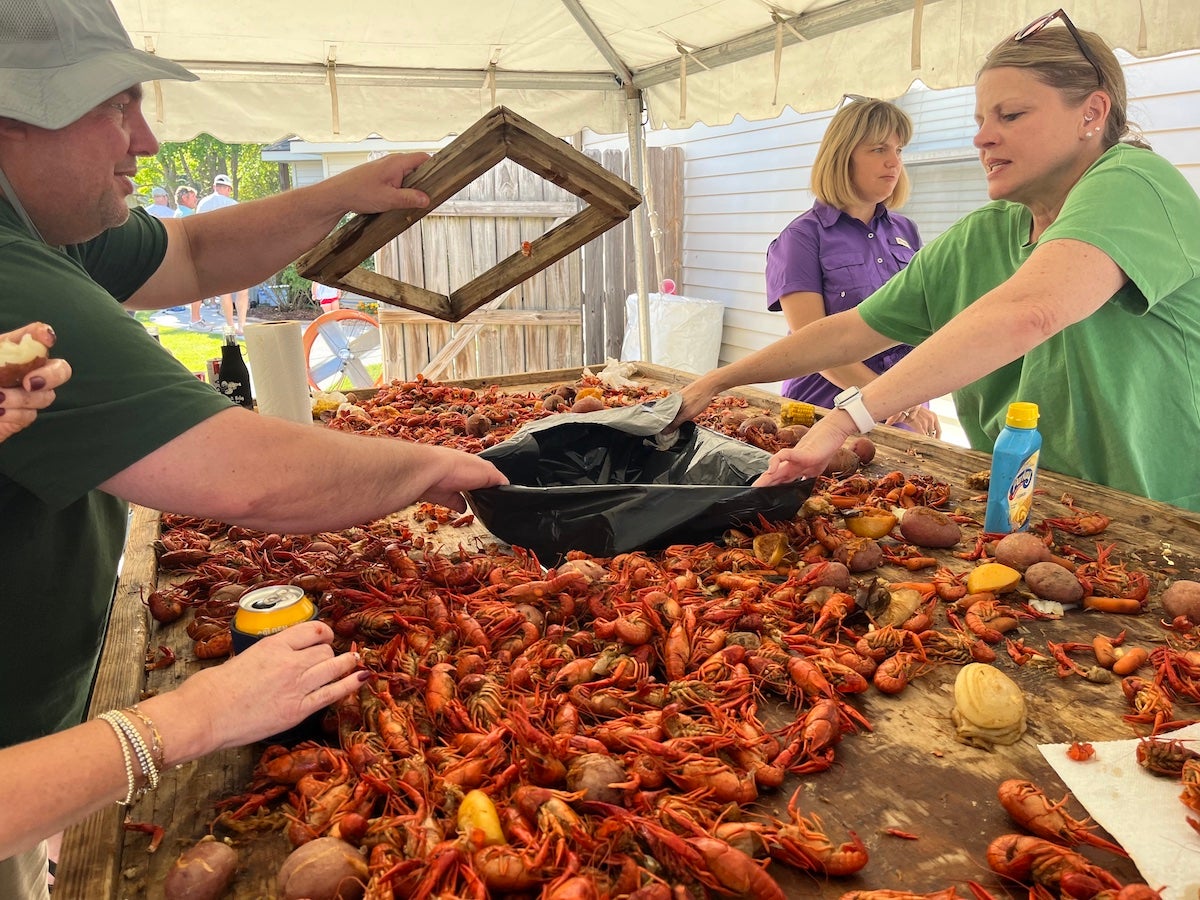
- Create the center hole: Measure and mark a 2’x1′-foot rectangle in the center of your plywood. Before cutting, reinforce the underside around your marked square with some scrap wood—this prevents the plywood from splintering when you cut it. Use your jigsaw to carefully cut out this center rectangle.
- Build the framework: Cut your 4×4 posts to 40 inches each—this will give you a final table height of about 42 inches, perfect for standing and eating without hunching over. Attach these to the four corners of your plywood base using wood glue and 3-inch screws, drilling pilot holes first to prevent splitting.
- Add stability: Cut your 2×4s to create bracing between the legs about 12 inches from the bottom. This keeps the table from wobbling when someone inevitably leans on it after their third beer.
- Create the lip: Using your 2×4s on edge, create a border around all four sides of the table top. This raised lip—about 1.5 inches high—is what keeps all those crawfish and their spicy juices from escaping. Secure these with screws from underneath the plywood and reinforce with corner braces for extra strength.
- Make the garbage bag frame: This is the pièce de résistance! Cut your 2’×1′ wood slightly larger than your center hole, creating a frame that will rest on top of the hole. Then cut another frame that’s slightly smaller than the hole. Connect these two frames at the corners with short pieces of the 2×2. This creates a “basket” that hangs down through the hole but won’t fall through thanks to the larger top frame.
- Sand everything smooth: Nobody wants splinters with their crawfish, so take your time here. Round off all corners and edges, especially around the top lip and center hole.
- Waterproof it: Apply at least three coats of marine-grade polyurethane to every surface of the table, including underneath and inside the center hole. Let each coat dry completely and lightly sand between coats for a smoother finish. This step is crucial—without proper waterproofing, your table will be a warped mess after just one season.
- Add finishing touches: Some folks like to attach bottle openers at strategic locations around the table’s edge. Others add hooks underneath for hanging paper towel rolls. My friend Ben even installed small LED lights around the border of his for night boils—completely unnecessary but undeniably cool when the sun goes down.
The Inaugural Boil
I’ll never forget our first boil using my new table. My friend Jeff, never one to offer compliments freely, stood there with a beer in one hand and a crawfish tail in the other, nodding appreciatively.
“This,” he declared, tossing another shell into the center hole, “is better than indoor plumbing.”
Coming from Jeff, this was practically a standing ovation.
The great thing about a seafood table is that it is custom-made for the event. People naturally gather around it, standing comfortably at the perfect height. The conversation flows as easily as the beer, unbothered by the usual chaos that comes along with the standard boil. The raised lip keeps everything contained, and the center hole eliminates the mountain of shells that piles up quickly.
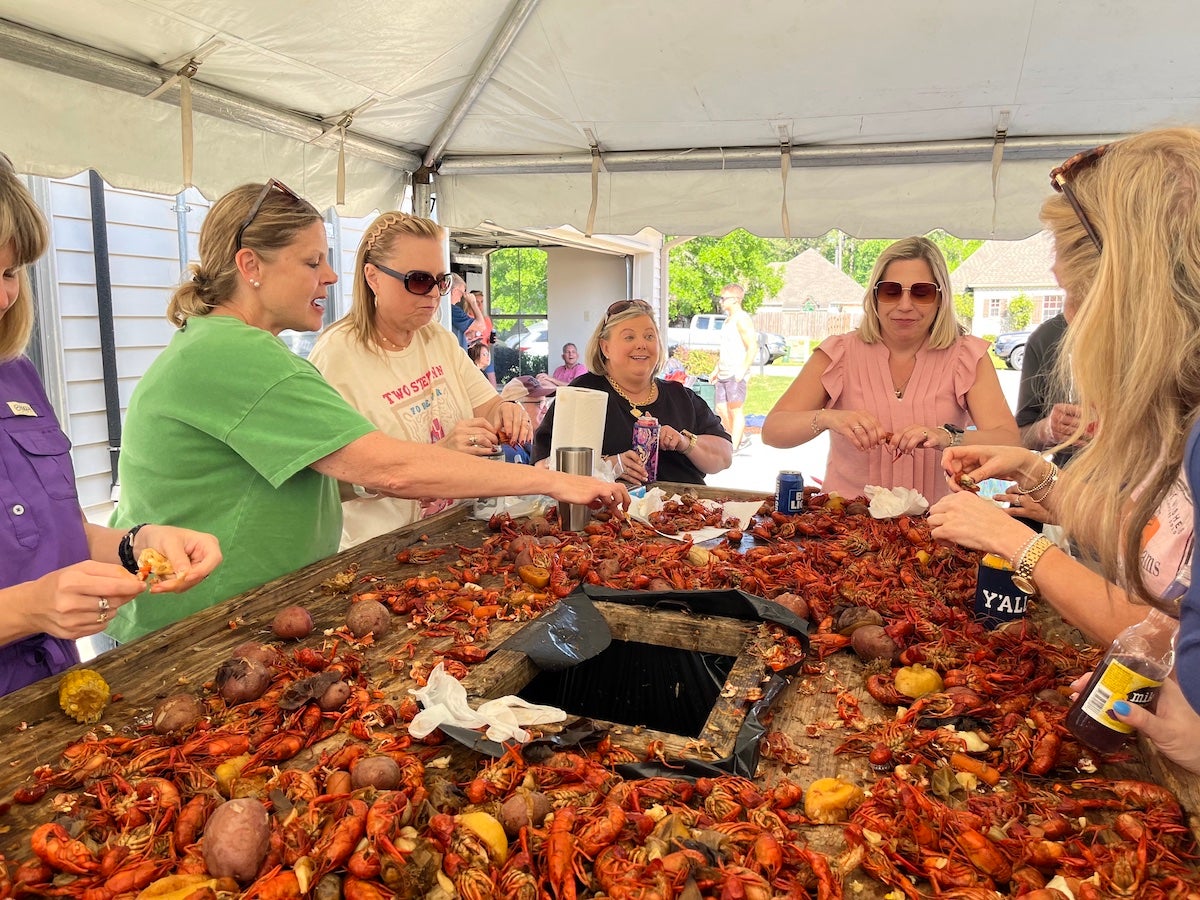
Best of all is the cleanup. When the feast is finished and everyone heads home, you simply lift out the frame, tie up the garbage bag, and replace it with a fresh one. A quick hose-down of the tabletop, and you’re done.
So if you’ve got a free weekend and the desire to elevate your crawfish boil game, I can’t recommend this project highly enough. It’s a piece of Louisiana ingenuity that you can pass down through generations, along with your secret spice mix and the proper technique for pinching tails and sucking heads.
As my Paw-Paw would say with a wink, “Laissez les bon temps rouler, but make sure you’ve got a proper table to catch all the mess, yeah?”

Trending Products